Add Collection
To add a new collection the "Add new promotion" at the top right of the Collections screen needs to be clicked.

This will load the main Promotion add/edit screen
This section is made up of multiple steps and each one will be explained below. This is the guide to build a collection style promotion with no discount or offer applied.
The submit button at the bottom of each section will save the data you enter in each area before moving onto the next
an example of this on the site would be /collection/workwear.
Settings
Here you select the type of collection you wish to create.

Vital Data
This section allows you to specify the vital information a collection needs in order to function on the website.
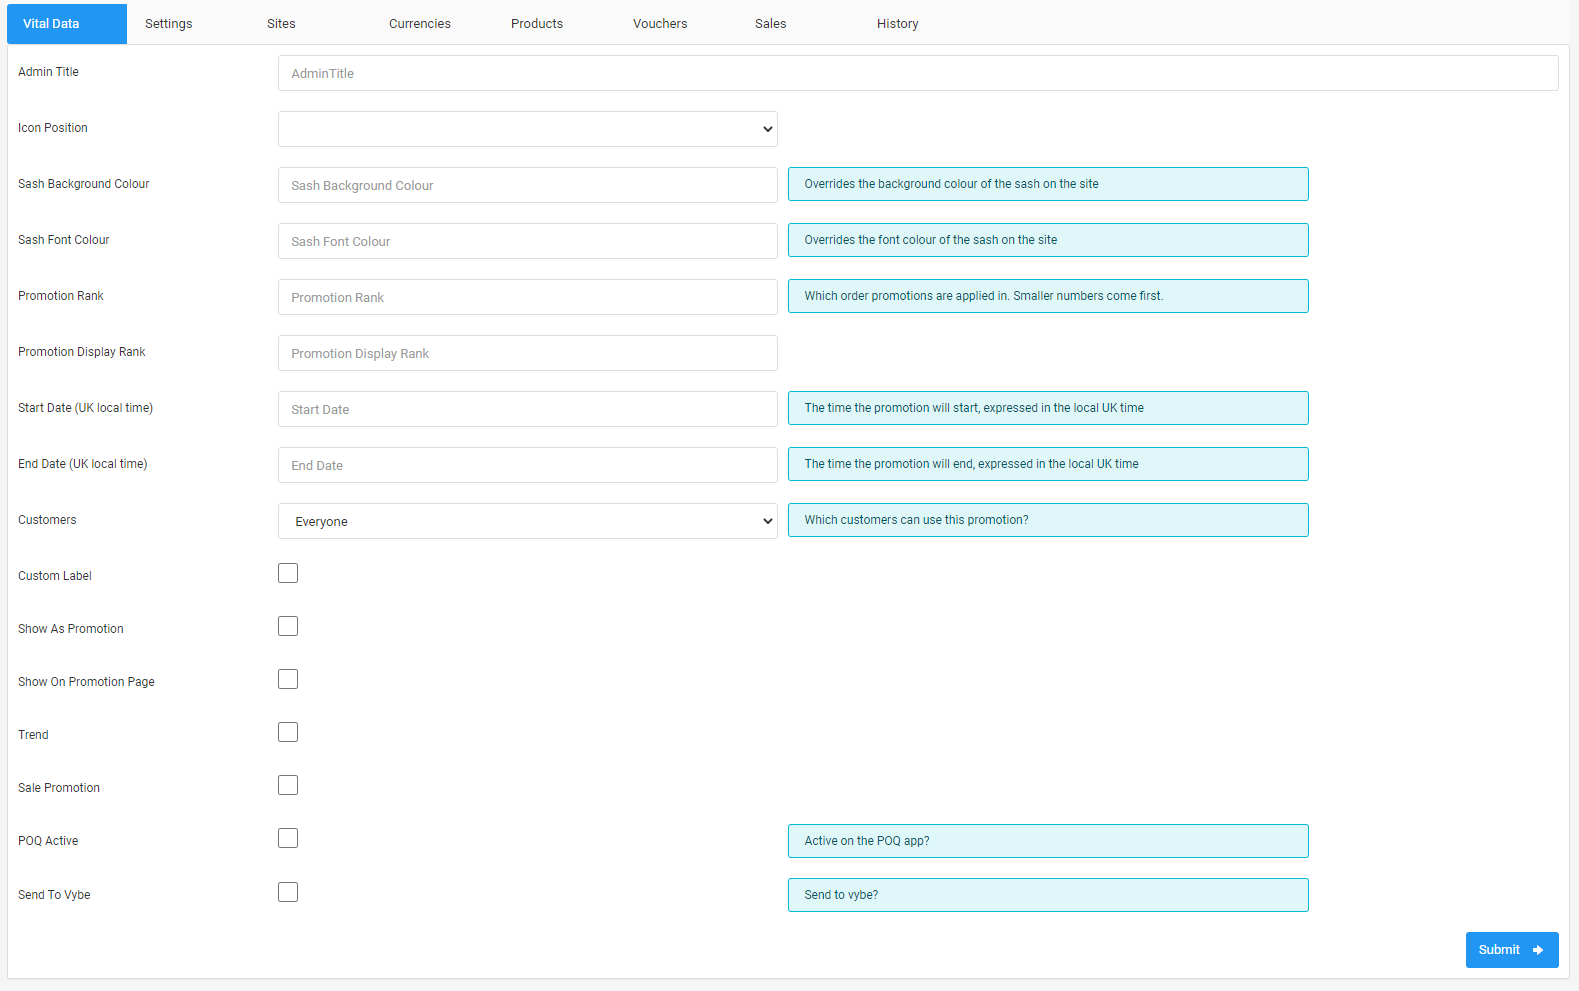
Here is the list if fields with a brief outline of it's use.
- Admin Title - Default name of the collection
- Icon Position - Set this to bottom center if you wish for a bottom sash to appear on the website.
- Sash Background Colour - Determines the BG colour of the bottom sash on the website (can be controlled for YC and BR separately)
- Sash Font Colour - Determines the font colour of the bottom sash on the website (can be controlled for YC and BR separately)
- Sash Opacity - Determines the opacity of the bottom sash on the website (can be controlled for YC and BR separately). Default (unticked) is 0.5 opacity, or 0 (opaque) if ticked.
- Promotion Rank - Which order promotions are applied in. Smaller numbers come first.
- Promotion Display Rank - Cortana rank order.
- Start Date - UK Time
- End Date - UK Time
- Customers - Everyone would be selected for all collections currently
- Custom Label - No longer Applicable
- Show as Promotion - Used for Cortana platform and to display the collection as a filter
- Show on Promotion Page - Used for Cortana platform and to display the collection on the promotions landing page
- Trend - Cortana Flag to tell the site it is a Trend and not Sale Promotion
- Sale Promotion - Cortana Flag to tell the site it is a Sale Promotion and not a Trend
- POQ Active - Will ensure the Collection goes into the App
- Send to Vybe - Will ensure the Collection goes into the Vybe application.
Sites
This section is required in order for the Collection to appear on the websites.
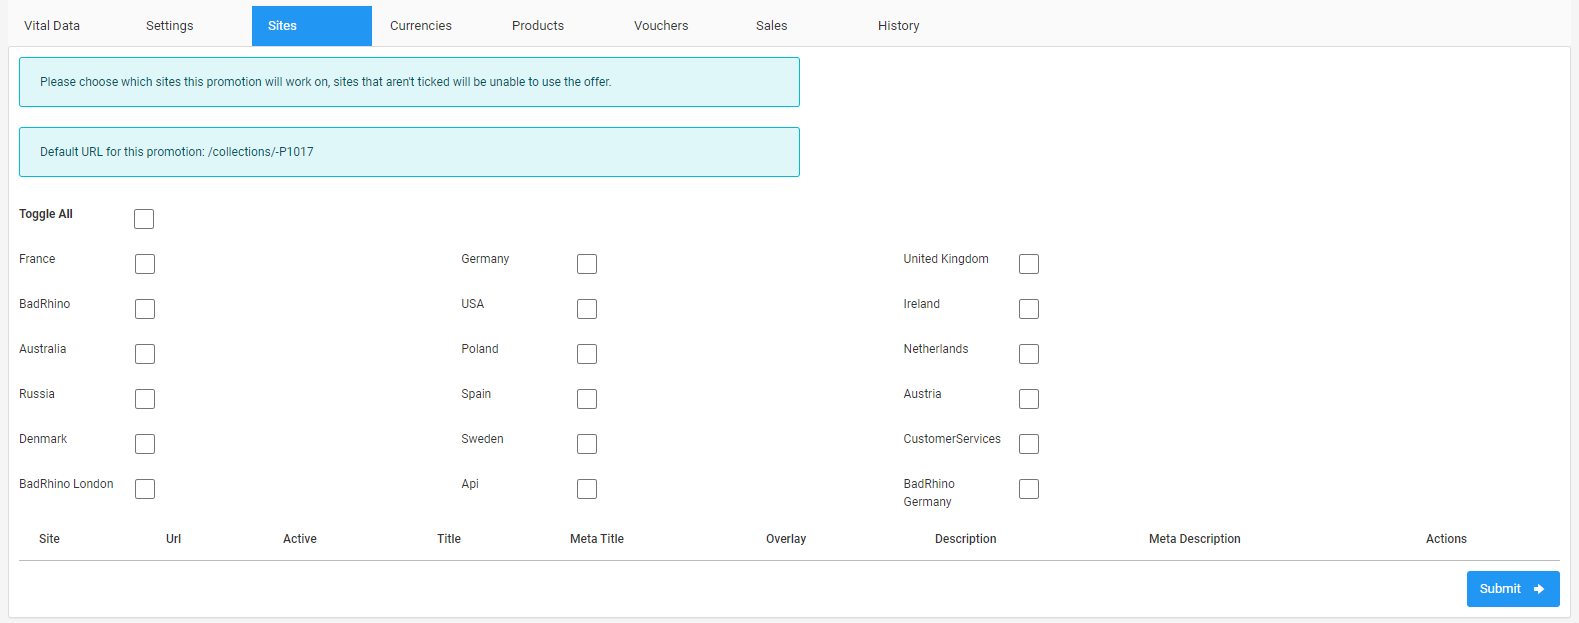
Simply Toggle All or select the specific sites you wish the collection to be available on. Click Submit and you will be presented with a table of site related content.

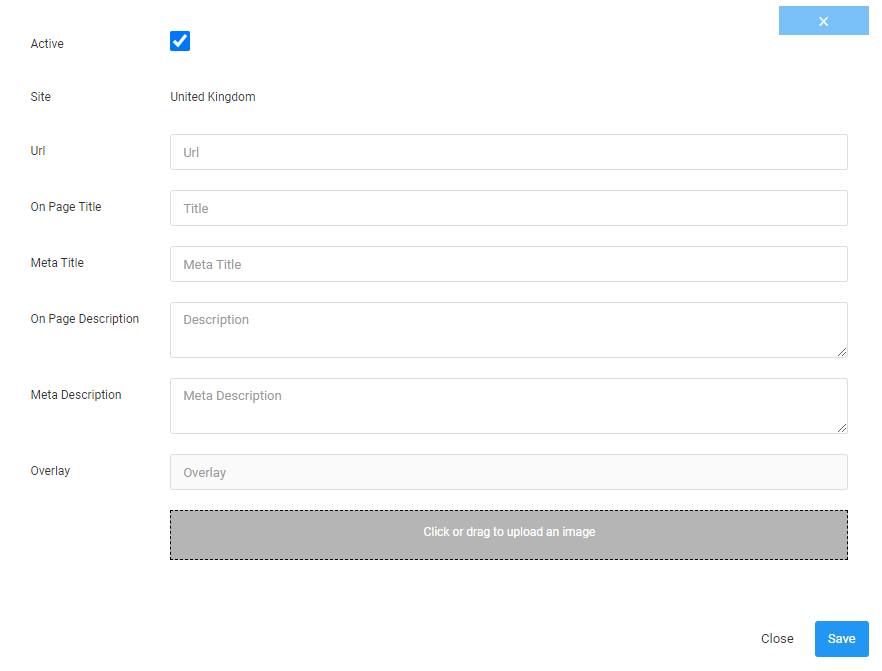
Here are the sites that this collection will appear. Clicking on Quick Edit will allow you to edit the site specific information for this collection such as title and description. Specifically used if you wish to transalte the title etc...
Alternatively you can click the All link on the table for one site and it will apply a copy of that data element to all other active sites.
Products

Number of groups for collections will always be 1.
To apply products to the collection you can:
Upload CSV - Click the choose file and choose the required CSV, this will assign all products to the collection. Please make sure you use the template when importing. (Any CSV with the 'ProductCode' field will work)
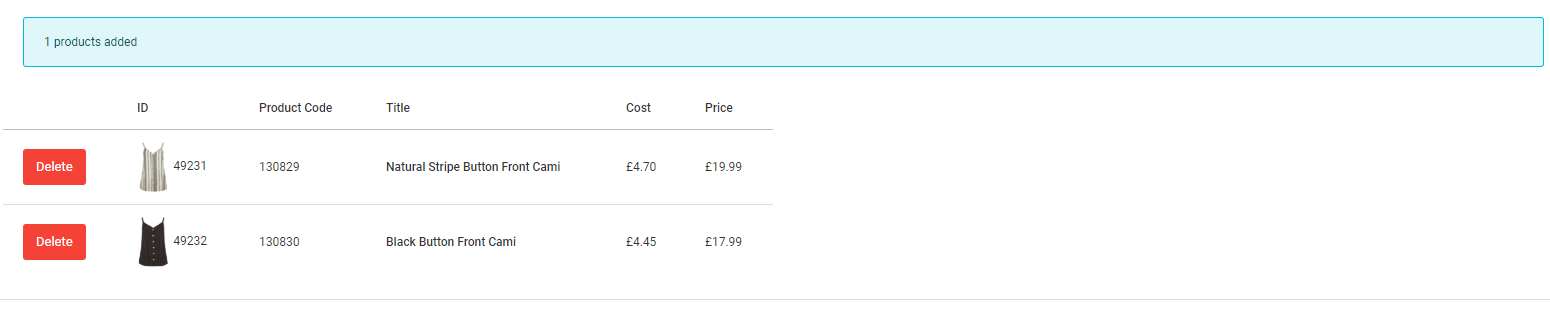
Search by product code - Enter a product code into the text box and click add, this will assign the chosen product to the collection.
Search by product ID - Enter a product ID into the text box and click add, this will assign the chosen product to the voucher.
Choose Category will assign all products within a certain category to the collection (eample would be to assign all knitwear to the sweats collection).
Once you click Add Products they will appear as active products below this section