App Navigations
Viewing App Navigations
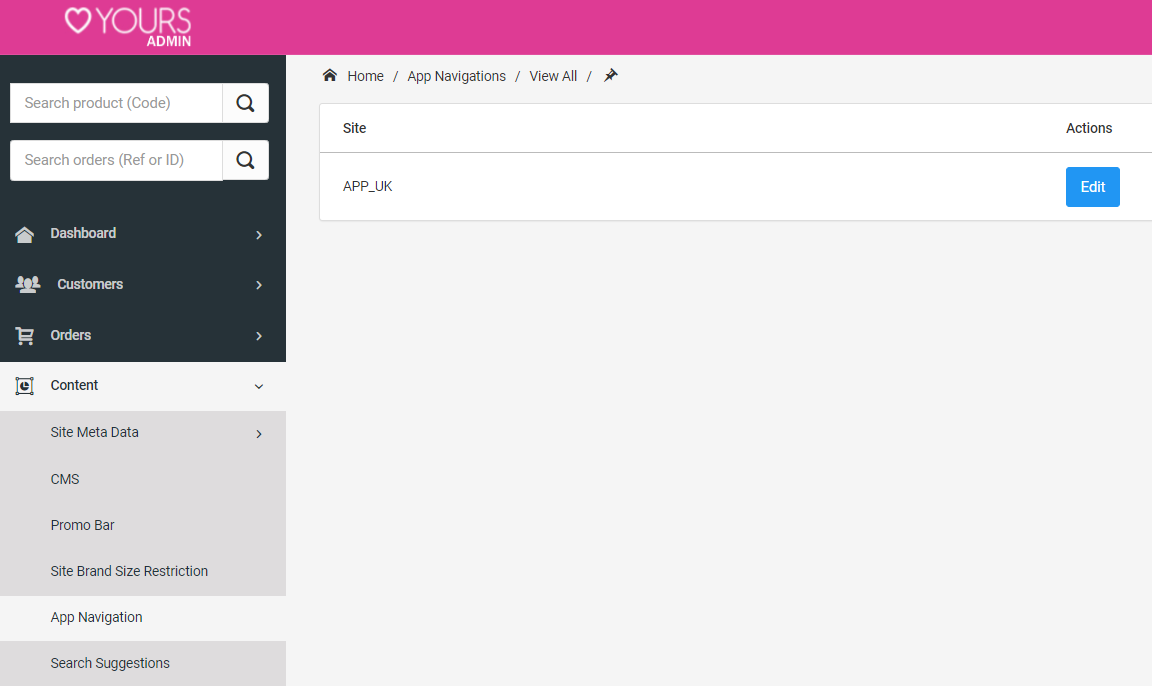
To view the app navigations page, navigate to Content > App Navigation
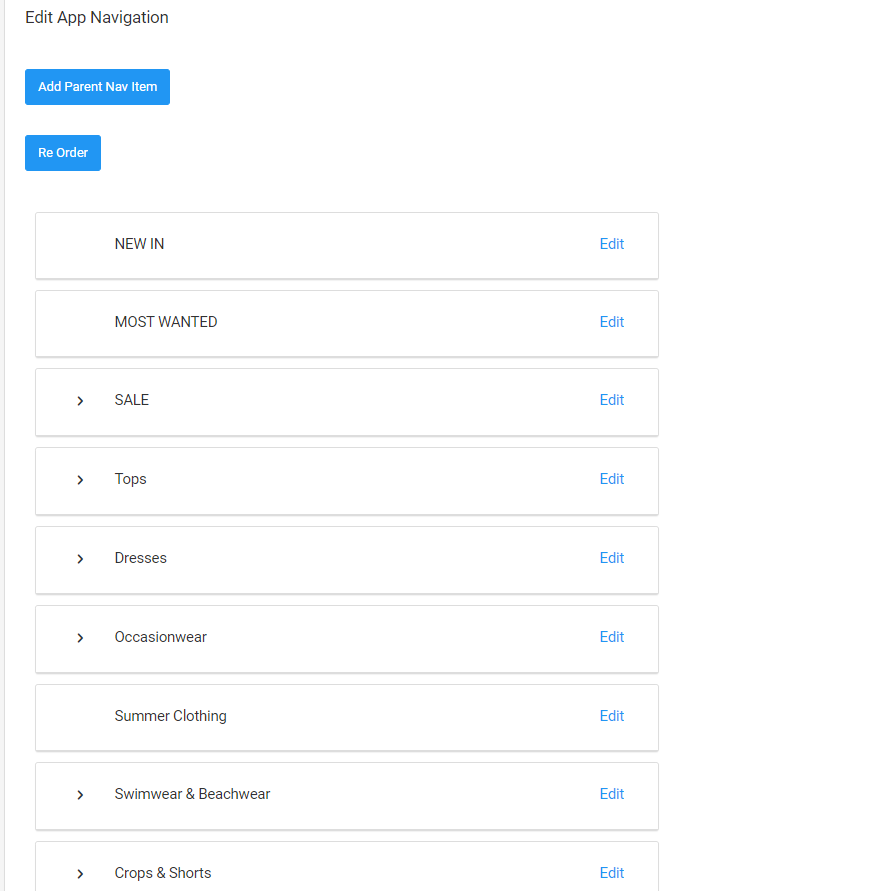
Here you can view which app navigations are available to update.
You may need permissions adding to view/edit this area. If a new app is created, a request to Remarkable will need to be made for this to added to the page.
If you want to view an example app navigation, click here
App Navigation Fields
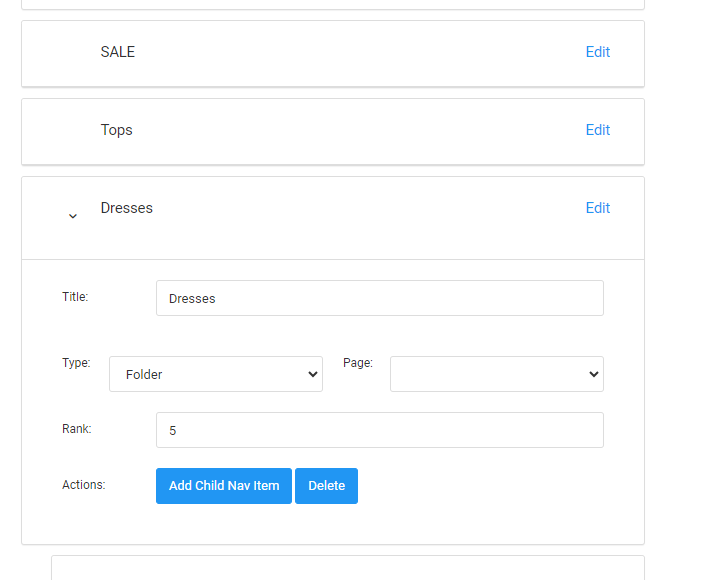
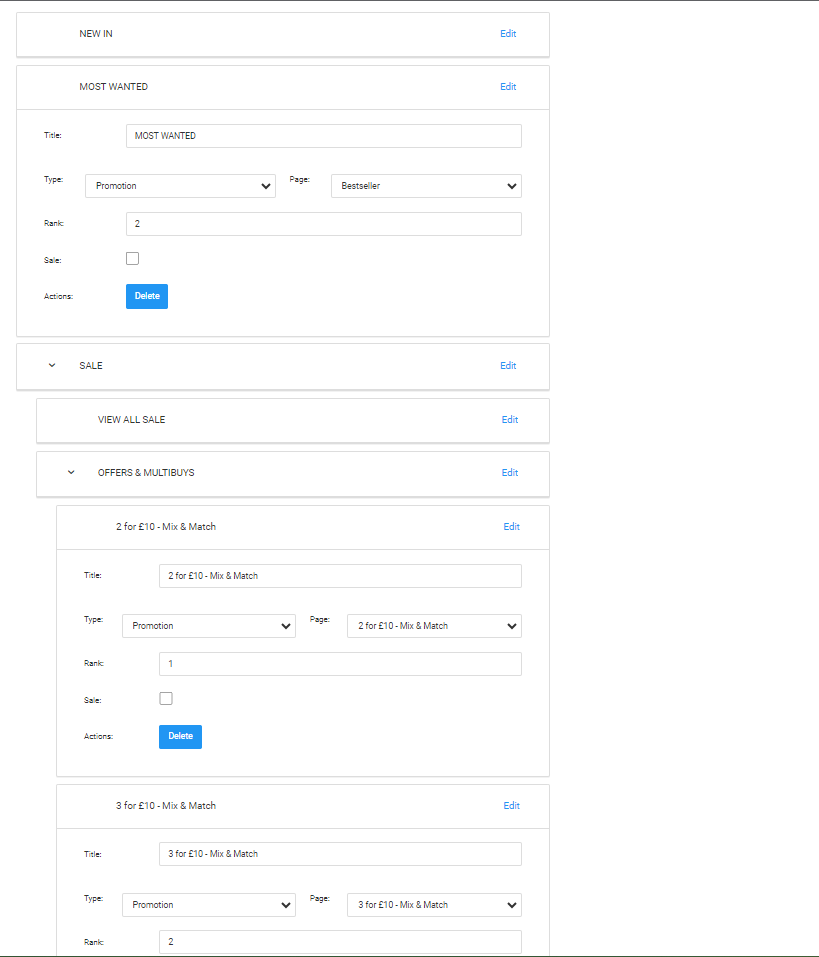
Title: This is the text you want to be displayed for this navigation item. If you leave it blank before choosing anything but a folder, it will inherit from your choice of link.
Page: This involves 2 dropdowns, the first is to select the type which can be 1 of the below options:
- Folder
- Category
- Subcategory
- Promotion
- Brand
- Magic Category
The second dropdown contains a list of what has been selected in the first dropdown, for example if you first selected Promotion, the second dropdown you could select "2 for £10 - Mix & Match" from the list. If Folder is selected for the first dropdown, you do not need to select anything for the second dropdown list.
A folder should contain a child app navigation item of one of the types above; there can only be 3 tiers of app navigation items.
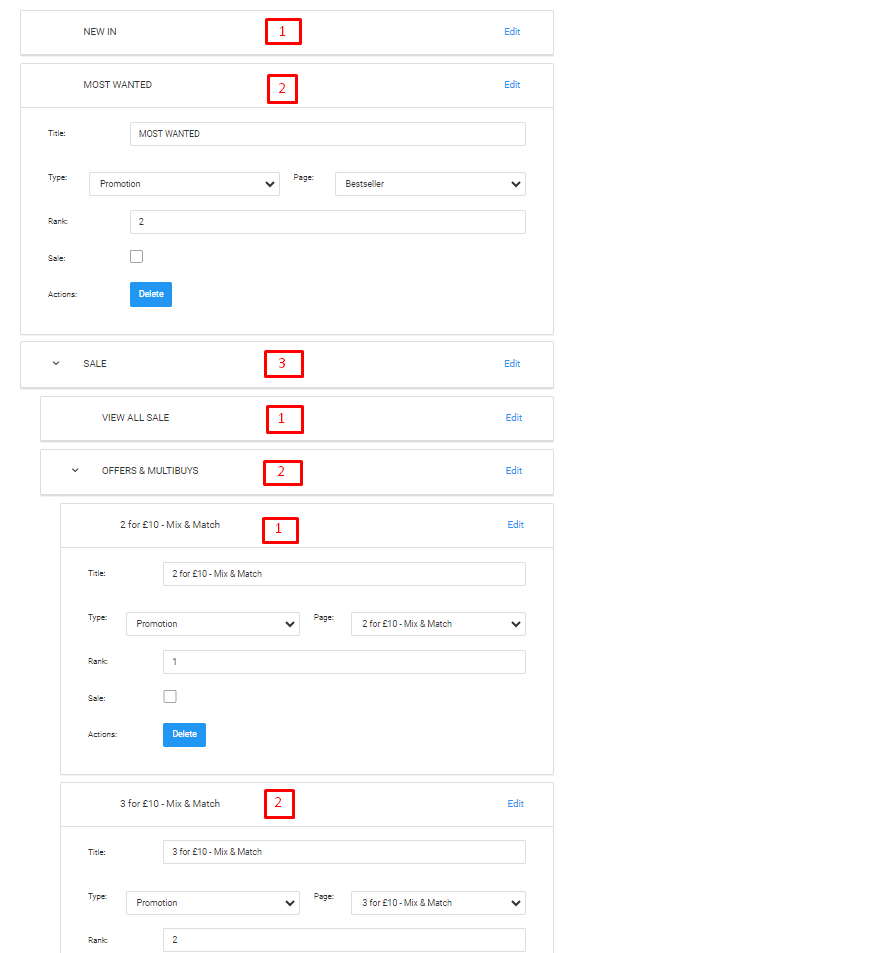
Rank: The order of which the app navigations are displayed depends on this, rank 1 will be displayed at the top. Rank also resets when you go to a new level.
For example, you can have three top-level items, ranked 1,2,3 respectively. If you add child links under one of them, they will also be ranked 1,2,3 etc. See the red highlights on the below image for an example
Sale: This is selected if the current app navigation item should have the sale filter selected. This is not needed for Folders or only Sale links, but when you are looking to limit a category such as Dresses to Sale-only dresses, you would just select the 'Dresses' category and tick the 'Sale' box. This will apply the Sale:true filter to the navigation link.


Please note that only when you click 'Save', will any of the below take effect. You can add/move/delete as much as you want but you must save the page for the changes to take effect. We advise saving regularly.
Adding a Parent App Navigation Item
To do this, you need to click on the Add Parent Nav item button at the top of the page, this will create a base navigation item for you to edit the fields.

Editing an App Navigation
Use the 'Edit' button seen on the screenshot above to edit an app navigation. You should see the options drop down for you. The previous section explains what should be entered for each box.
Note that Folders that can be dropped down have an arrow next to them, which you can click to view their child navigations. Non-folders will not have this as you can't nest anything except folders.
There is validation on this page which should produce explanatory error messages. For example, you can't change a folder to be a category if you have child links, as only folders can have child items.
Adding a Child App Navigation Item
To do this, you need to click on the Add Child Nav item button in the navigation item you would like this to navigate through, this will create a child navigation item for you to edit the fields. A child navigation item can only be added under a folder.

Saving an App Navigation
To save any additions/updates you will need to click the save button at the bottom of the page.

Deleting an App Navigation
To delete an app navigation, click the delete button for that app navigation item. This will set the app navigation as deleted. If you delete a parent app navigation, this will also delete the child app navigations for this item.
![]()
Reorder
To reorder the app navigation items you will need to change the selected app navigation item to the desired rank; the surrounding app navigations may need to have their ranks adjusted as there cannot be multiple app navigation items under the same parent with the same rank.
After changing their ranks you will need to click the Re Order button, this does not save the new order. To save navigate to this previous section

Example app navigation
Example expanded app navigation item
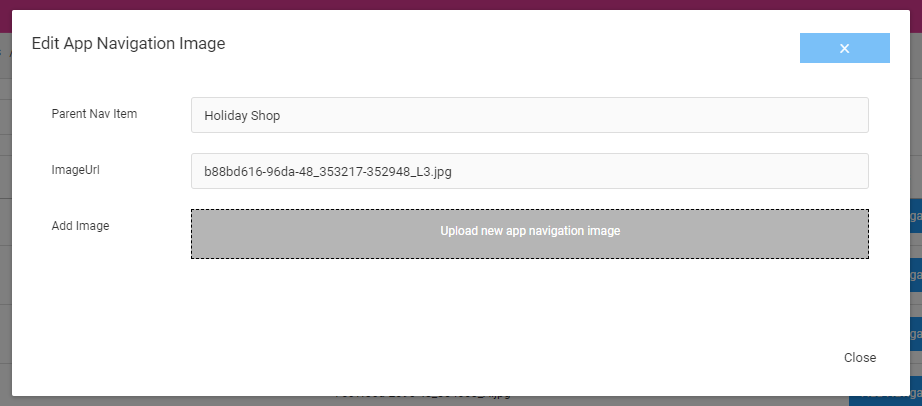
Adding App Navigation Images
To view and edit the app navigation images, navigate to Content > App Navigation Images (LTS)
This functionality is only available for the LTS App.
You may need permissions adding to view/edit this area. If a new app is created, a request to Remarkable will need to be made for this to added to the page.
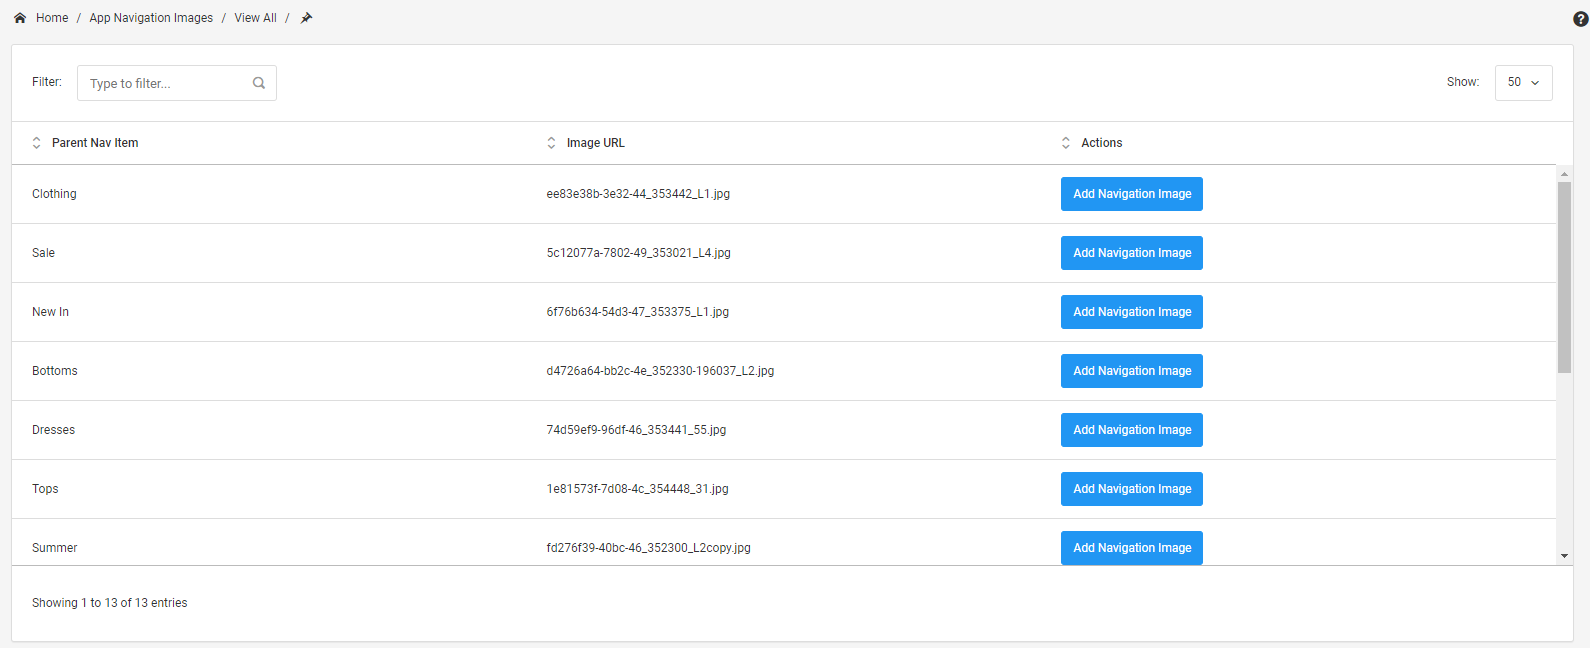
App navigation images can only be assigned to parent navigation items.
To add an app navigation image, click Add Navigation Image and upload the image. Once uploaded, this will be automatically saved unless an error message is displayed.